Showing posts with label Thin Cuts. Show all posts

Saturday, April 16, 2022

Layered Flowers Technique Blog Hop

Welcome to our Technique Blog Hop! This month, we are featuring Layered Flowers as our technique. This could be achieved through Thin Cuts, Cricut cuts, stamp images, or even with masking.


This blog hop is a great big circle so you can start wherever you want and continue through to see all the fabulous artwork incorporating this technique.

If you are coming from Michelle's Blog you are on the right track! 

Easter is this weekend, and I like to do pages in advance- I know I'll be wearing a bright and cheerful dress so I wanted to use bright colours for this year's Easter Family Photo scrapbook page. 

I also set myself a challenge to combine birthday papers, an Easter stamp set and florals!

I used the Mix In Paper Packet as the base, and added some other paper accents using the Cake Day Paper Packet and the Cake Day Picture My Life Cards. 


The Layered Flowers Thin Cuts make it so easy to add bold embellishments- I used a combination of Green Apple, Wild Berry and Lemonade Cardstock from the Cake Day Coordinating Cardstock to create the flowers. I also added Wild Berry Dots to some of the flowers.

Here you can see even more floral accents- I cut the Easter Eggs out from my Cricut using the EGGS font on my computer, and then tone on tone stamped some flowers from the Some Bunny Loves You Stamp Set and Thin Cuts. The floral border at the top is also from this stamp set and layered with some more Wild Berry Dots.


As a side note- how cute are these chicks from the stamp set! I had to add them into my layout.


I think I managed to combine Birthday, Easter and floral accents successfully into my layout- what do you think?

Thanks for stopping by!  Please continue onto Darlys' Blog where you will find her sharing her layered flowers technique.  Be sure to leave a comment and happy hopping!

Friday, April 15, 2022

Australasian In Full Bloom Blog Hop


Hello and welcome aboard our In Full Bloom Australasian Close to My Heart Blog Hop. 

If you have arrived here from Scrappy Chicks then you are in the right place. 

If you landed here by accident, no problem, please join in by following the link at the end of this post. 

Today I would like to share with you a creation which features Close To My Heart’s April Featured collection, In Full Bloom.

I wanted to do a double page layout, and this free sketch from CTMH helped get my creativity flowing!

I used the Mink cardstock from the In Full Bloom Coordinating Cardstock as the base, accented with Lagoon, Black and Avocado from the cardstock pack.


On the left hand side of the page, I made a feature out of the beautiful floral paper from the In Full Bloom Paper Packet, also using the striped paper as a border accent. 


I then used my Watercolour Pencils to colour the thin cut flowers from the In Full Bloom Scrapbooking Stamp Set and Thin Cuts. The detail in these stamps is so intricate!


On the right hand side of the page, I added some more thin cut flowers and Black Dots, as well as a leaf embellishment from the Layered Flowers Thin Cuts. The black hearts are leftover from another project but I added them for a bit of contrast. 


Lastly, I stamped the title and added a butterfly from the In Full Bloom Scrapbooking Stamp Set and Thin Cuts, as the large sentiment fit the space perfectly.

I hope you have enjoyed this project, it was such fun to put together and I can't wait to add some photos! If you love this collection and do not have a consultant please contact me or place an order here.

I'd love you to leave a comment before heading off to the next stop, Kimmi Adds Sparkle.

Wednesday, March 16, 2022

Technique Blog Hop- Creative with Cardstock

Welcome to our Technique Blog Hop! This month, we are featuring lots of awesome ideas with cardstock.

This blog hop is a great big circle so you can start wherever you want and continue through to see all the fabulous artwork incorporating this technique.

If you are coming from Michelle's Blog you are on the right track! 

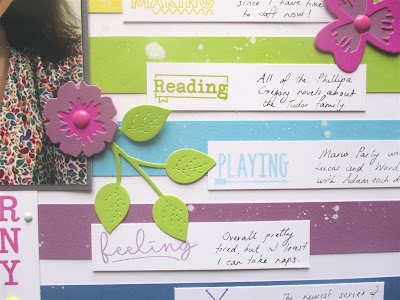
I absolutely love all the bright colours of cardstock that CTMH has- such a pretty rainbow of brightness! I created a 12x12 layout using eight strips of 1 x12 cardstock in Wild Berry, Candy Apple, Nectarine, Lemonade, Avocado, Capri, Grape and Sapphire as I wanted to showcase some of my favourite colours. This layout background is a fun way to create different colour combos on your layout, and you can also do this with patterned paper or a combination- anything you like! I slightly trimmed the White Daisy base and layered in on Pewter cardstock- this is one of my favourite techniques to anchor a layout. 


I also cut up some White Daisy cardstock into 7/8 inch strips to do my journalling, and stamped each one using the corresponding ink colour using the All Day Every Day stamp set. 

Another favourite technique of mine for cardstock backgrounds is to use Watercolour Paints to splatter the background and create a grunge look- here I used white to offset all the colourful strips but you can use any colour you want! I simply loaded my waterbrush, added the white paint and flicked it onto the page. 


I also used cardstock and the Layered Flowers Thin Cuts to create the floral embellishments on this page- CTMH cardstock cuts like butter and the stitched detail on these thin cuts is amazing. I added some Wild Berry Dots to the centre of each flower for some dimension.


The last thing I like to do with cardstock is to stamp my title on it and then dovetail the ends to make a pennant. This is a really easy way of adding any cardsotck journal box, stamped title or even plain cardstock as an embellishment. I stamped this in Wild Berry Ink and then surrounded the title with some of the Cake Day Dots.


Cardstock only layouts don't have to be boring- thin cuts, paint splatters and dove tailing can all take your cardstock elements to the next level.

Thanks for stopping by!  Please continue onto Haley's Blog where you will find her sharing her cardstock technique.  Be sure to leave a comment and happy hopping!

Tuesday, March 8, 2022

Love Card for Color Dare #486

 I have been able to do a bit of crafting over the weekend, thanks to the challenges and prompts I keep finding!

This week's Color Dare was quite specific, but one I could manage!


I started off with a Candy Apple card base, complimented by Lilac and Flamingo colours for my other colours.


I added Black and White as my neutrals, and finished off with some Purple Glitter Gems .

I hand stamped all the little xoxos onto the Candy Apple hexagon, and the 'love" is a a thin cut. 

You will notice that this is a gatefold card too, so it will open up for a message to be written inside.

Thanks for stopping by today!

Monday, March 7, 2022

On the Green


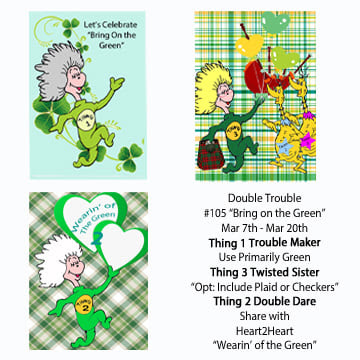
This week, Heart 2 Heart has partnered up with Double Trouble to create a Green inspired challenge!


For some reason, my brain did not immediately think of St Patrick's Day but a golfing green, and I knew I had this green paper in my stash, so this card came together very quickly using the My Hole In One Stamp Set and Thin Cuts. The only embellishment I added was some wood look sequins.


This card was made specifically for a golf-loving boss of mine, and so I hope he likes it! Thanks for stopping by today. 

Thursday, September 16, 2021

Make It Shine Technique Blog Hop

Welcome to our Technique Blog Hop!  This month there are 11 of us highlighting a technique to make it shine!


This blog hop is a great big circle so you can start wherever you want and continue through to see all the fabulous artwork incorporating this technique.

If you are coming from Haley's Blog you are on the right track! 

I absolutely love our range of Glitter Paper, and I decided to use the new Harbour Glitter Paper to create this card. I cut thin strips and placed them on an angle spaced with the Pumpkin Spice Paper Packet, and then matted the pieces onto White Daisy Cardstock framed With Harbour Cardstock.


I also cut the sentiment using the Harbour Glitter Paper using the Artbooking Cricut cartridge for some extra shine!

The finishing touch was the flower cluster created with Paprika, Papaya and Rosemary Cardstock as well as some more Harbour Glitter Paper in the centre of the flower, using the Layered Flowers Thin Cuts.

Thanks for stopping by!  Please continue onto Tamara's Blog where you will find her sharing her technique to make it shine.  Be sure to leave a comment and happy hopping!

Thursday, September 2, 2021

September SOTM - Grateful for This Life Blog Hop

Welcome to our Stamp of the Month Blog Hop!  We will be featuring September's SOTM, which is Grateful For This Life, a set of 16 stamps.  


If you have come here from The Inky Scrapper, you are on the right path! The blog hop is a great big circle, so you can start here and work your way all around.  If you get lost along the way, you’ll find the complete list of participating consultants on Melinda’s Blog. 


This month we have 13 Close To My Heart Consultants sharing their creations using this month's SOTM and other great CTMH products on their blogs. This is simple to do - just click on the link at the end of the post on each blog to move to the next one! Here we go!

 The large sentiments in this stamp set made it perfect for a slimline card- I grabbed one of my Slimline Card Bases long with the Stamp of the Month and got to work!


I used lots of new colours to create this card- I stamped the sentiment in Harbour Ink on Papaya Cardstock. I love how you can mix and match all of these sentiments to find a greeting just right for any occasion.


I then used the new Layered Flowers Thin Cuts to add a floral embellishment to my card using Harbour, Rosemary, Paprika and Papaya Cardstock as well as the new Harbour Glitter Paper. Look at the gorgeous stitching detail in these thin cuts! I also popped up one of the flowers with some Thin 3D Foam Tape for some added dimension.


Now "Hop" on over to Gina's Blog to see her work! Be sure to visit all the Consultants at their Blogs to get some great crafting ideas and other fun ideas! Remember, the September SOTM is only available until the 30th September!  Contact your CTMH Consultant (or click here) to see how you can get this stamp set at a discount!

Wednesday, June 16, 2021

Here Comes The Sun

Welcome to our Technique Blog Hop!  This month there are 13 of us highlighting the Sunburst Technique.  

This blog hop is a great big circle so you can start wherever you want and continue through to see all the fabulous artwork incorporating this technique.

If you are coming from Brandi's Blog, you are on the right track! 


I couldn't wait to get my hands on the new Sunburst Background Thin Cuts- how awesome is this for creating a Sunburst effect quickly and easily?

Here are two different ways I love to use this Thin Cut. 

The first way is to cut this using different colours of cardstock or different patterned paper. I cut the frame in Sapphire, and then cut the thin cut using Carolina, Bluebird and the Stars and Sparklers Paper. I then just used the pieces within the frame, like a jigsaw puzzle! I also used a sentiment from the coordinating Spot On Sentiments stamp sets, which coordinates perfectly with the circle part of the thin cut. I stamped the sentiment in Scarlet Ink and the card was finished! 


My second way is to simply put some patterned paper behind the thin cut. Here I cut the thin cut in White Daisy Cardstock, and simply glued it on top of the black silver star cardstock from the Happiest Place Coordinating Cardstock. I kept with the silver theme by stamping a firework from the Stars and Sparklers Cardmaking Stamp Set in Charcoal Ink, and then rotating the stamp and stamping the next layer with Versamark and embossing with Silver Embossing Powder. I then stamped the sentiment in Black Ink from the Party Girl stamp set. 

Thanks for stopping by!  Please continue onto Kim's Blog where you will find some additional artwork highlighting this technique!  Be sure to leave a comment and let me know which card you like the best,  and happy hopping!

Monday, June 7, 2021

Stenciled Background with So Tweet


This week at Heart 2 Heart, we want to see you Get Inky!

I recently went to a fun consultant training day, where one of our projects was this adorable card using the new So Tweet Stamp Set and Thin Cuts. 


I absolutely love chickens so this was one of the first stamp sets I purchased when the new catalogue came out. 

We created the background of this card by using the Stencil Pack 2 and sponging over this with Picked Raspberry Distress Oxide Ink. We then stamped the sentiment and the little flower icon in Raspberry Ink on a diagonal to line up with the diagonal lines. I then added the thin cut chick with the balloon that I had coloured using my markers, and stuck it to a Stitched Bracket Thin Cut that I splattered with Raspberry Shimmer Brush. 


The finishing touch was to add some Gold Glitter Gems- what do you think?

Tuesday, May 18, 2021

Happy Day Cloud Background


This week at Heart 2 Heart- the technique set is sponging- and I knew exactly what I wanted to do!

I have been waiting to use this Build A Rainbow Thin Cuts since I first purchased them- so I got to work creating a card with these.


I cut one of the clouds and used that as a template to sponge a piece of White Daisy Cardstock using Glacier Ink and a Sponge Dauber. 


I just kept repeating the sponging process, using the cloud thin cut as a guide, until I had completeted the background. 


To create the completed card- I used a piece of yellow stripe paper from the In This Together Paper Packet and then matted the sponged background onto Grape Cardstock. I then cut the rainbow from Candy Apple, Nectarine, Clover and Lagoon cardstock and added two more clouds, which I also sponged with Glacier ink and popped up on 3D Foam Tape for some extra dimension. 


I stamped the sentiment from the Hillside Cottage Cardmaking Stamp Set using Grape Ink, and my card was done! I would love to know what you think. 

Saturday, May 15, 2021

Hillside Cottage Australasian Blog Hop


Hello and welcome aboard our Hillside Cottage Australasian Close to My Heart Blog Hop. 

If you have arrived here from Shaunna then you are in the right place. 

If you landed here by accident, no problem, please join in by following the link at the end of this post. 

Today I would like to share with you a creation which features Close To My Heart’s May Featured collection, Hillside Cottage. This gorgeous collection evokes such a homey, cosy feel for me.

I wanted to create a layout that could be used for a variety of photo occasions, and the Blue Belle cardstock framed with black helps to showcase these papers perfectly. I created this using some leftover strips of Hillside cottage, and look at the cute clusters of flowers from the sticker sheet!


I stamped the Love title using the May Stamp Of The Month, Flowers For You, and then added some of the Hillside Cottage Shapes for the hearts.

I also want to share with you an adorable card my son helped me to make, using the Hillside Cottage Cardmaking Stamp Set and Thin Cuts and the Hillside Cottage Shapes. We stamped the fox in Paprika ink, and then cut him out and added a little Black Dot to his nose. The sentiment is from the stamp set and we also stamped some leaves from the stamp set along the border using first and second generation Avocado ink. We added some more of the Hillside Cottage Shapoes too- I love how you can mix and match the Black and Wooden pieces together!

I'd love you to leave a comment before heading off to the next stop, Doris' Creative Inspirations..

Monday, May 3, 2021

Celebrating Connections


This week at Heart 2 Heart, we are all about celebrating connections!

The layout I am sharing with you today has multiple layers of connection.

First- the layout shows the connection between myself and my wonderful fiance. We are celebrating here for a 40th birthday- another connection. And this layout was inspired by one of my scrappy friends Laura, which is the final connection!

I used the brand new You Are Enough Cardstock to create this layout. The photo does not do it justice as it is a stunning rose gold foil. I pieced together 13 squares of the cardstock, mixing foil and plain, at 2.5 inches square. I added a photo mat in Sapphire Cardstock, and created a beautiful butterfly embellishment using the new Layered Butterflies Thin Cuts then matted the squares on White Daisy and Blue Belle Cardstock. Lastly, I stamped the celebrate title in Sapphire Ink using the Party Girl stamp set.

We would love to see your card, scrapbook page or paper project celebrating connections!

Tuesday, April 20, 2021

Hey Hot Stuff!

This week at Heart 2 Heart challenges, in honour of Earth Day, use something old with something new.

I saw the cute Salt and Pepper shakers in my new Eat Play Love Wood Shapes, as well as the salt and pepper shakers n the patterned paper, and I immediately knew I wanted to pair this with my old We Belong Together stamp set, which has a whole lot of cute food pairings.

I then thought how cute all of the patterned paper squares would be on a card from this sheet of paper in the new Eat Play Love collection.


Then I had a great idea to put them under our older Multi Square Windows Thin Cuts and my card was born!

I used the Hey Hot Stuff sticker from the Eat Play Love Sticker Sheet, and the sentiment was stamped with Candy Apple Ink using the We Belong Together stamp set. I also stamped the cute little ketchup and fries from the stamp set, and the rest of the icons are form the paper packet.

I added the wooden salt and pepper shakers, and my card was done!

We would love to see your Old and New projects over at Heart 2 Heart challenges!